Dreamweaver Tutorials: Creating Marquee with Dreamweaver Cs5 using CSS styles / rules
When extra emphasis is needed for a heading or text on your website, you might consider using a marquee effect. Marquee HTML code causes text or a graphic to scroll across your website. Learn how to create scrolling text which can travel in any direction at any speed. 1. Determine the text or graphic that you want to scroll on your website. This should ideally be a small amount of text or a small graphic, as large amounts of scrolling text can be difficult for your website visitor to read. Marquees in HTML are ideal for news tickers, eye-catching headlines or important announcements. 2. Use the “marquee” HTML tag to create any type of scrolling text or graphic. At its most simple, you can create a right to left scrolling piece of text by writing “marquee SCROLLING TEXT/marquee” and replacing the text in all capital letters with the text you want to scroll. The text will scroll at a moderate rate of speed across the entire section of the website you put it in. You can also use other HTML text attributes, such as headings, font color, font style and size within the marquee tags. Always remember to close the HTML tag with “/marquee” at the end, or your entire website will scroll. 3. Adjust the width of the marquee tag in HTML by using a width attribute added to the marquee code. For example, “marquee width=”30%”” will scroll the text on only 30 percent of your website. Of course, you can also include the marquee HTML tag within a style sheet or table website layout. Height …
Video Rating: 5 / 5
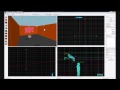
To make this properly, you will need to download this FGD file for hammer: www.editlife.net It will also make things like adding ammo to weapons much easier. Step by step: 1. Have a camera model if desired (prop_static) 2. Create a point_camera entity and move it to the desired location of your camera. Then go to the properties and give it a unique name (cam, cam1, camera, etc). Change the Pitch Yaw Roll to where ever you want it to point. 3. Hit apply once you are done, now you want to make your monitor. 4. Create a brush on the wall or wherever you want your monitor to be displayed. Fill it with a ‘nodraw’ texture so the camera only shows on one side. 5. On the main side for the monitor, use the face edit sheet (CTRL+A) and click the main face. For the texture, press Browse and type monitor in the search area. Pick a camera texture, and press Fit under Justify. Press Apply. 6. Now select your monitor brush and press CTRL+T (or right click & Tie to Entity). Make it a func_monitor. Give it a name. At the bottom, for camera name, pick the name of the camera you just created. Hit apply. 7. You are now done. You can go more advanced and create buttons to control the monitor. *Notes* – You can only show 1 camera on all of your monitors at a time in Source. – Some of the textures are transparent for a hologram effect. – Your player will not show up in the monitor for yourself, but other players will. You will only see your muzzle flash. – You need the FGD file for this …
Video Rating: 4 / 5